
How to Dissect a Flower and Create Powerful Observations

I am so excited to share our latest project with all of The Learning Hypothesis readers! A huge thanks goes to Kim for inspiring us to have fun with hands-on science. Thank you for including me in your Science Celebration! You can also join the challenge that starts on April 20th.
Flower Dissection
a hands-on, introductory lesson about plants
for elementary aged children
Our child-led approach to kindergarten science brought us to the grand opening of our local Children’s Garden several weeks ago. Since then, all my son can talk about is seeds, Seeds, SEEDS! He’s obsessed in the best possible way. We’ve spent many hours researching plants and gardening in our area, and have started our own container garden!
Today we tried something a little different. Instead of planting our new, young zinnias we dissected them!
Flower Dissection
Materials
- potted flowering plant (we chose a zinnia)
- scissors
- index cards
- pen/pencil
- tape
- construction paper or poster board
- microscope or magnifying glass
Procedure
Remove one flower from the pot, carefully keeping the entire plant intact.
Examine the complete flower.
Investigate!
This project was an excellent exercise for vocabulary. Encourage your child to describe what s/he sees, feels, and smells throughout the activity. Discuss textures, colors, patterns, size, and shapes.
How does the flower feel? look? smell?
Compare the qualities of different plant parts (i.e. the stem is stiff, the petals are soft).
Can you name any of the flower parts?
Examine the flower up close. Have you ever seen this before?
Prompt your child to talk about plant parts. Are the roots thick or thin? Long or short? Why do you think they circle around the bottom of the pot?
How many petals does the flower have? Do all the flowers have the same number?
Can you spot any new growth? Buds? New leaves? Look for smaller growth to compare to more mature areas of the plant.
 Carefully rinse the plant, noting any changes you see.
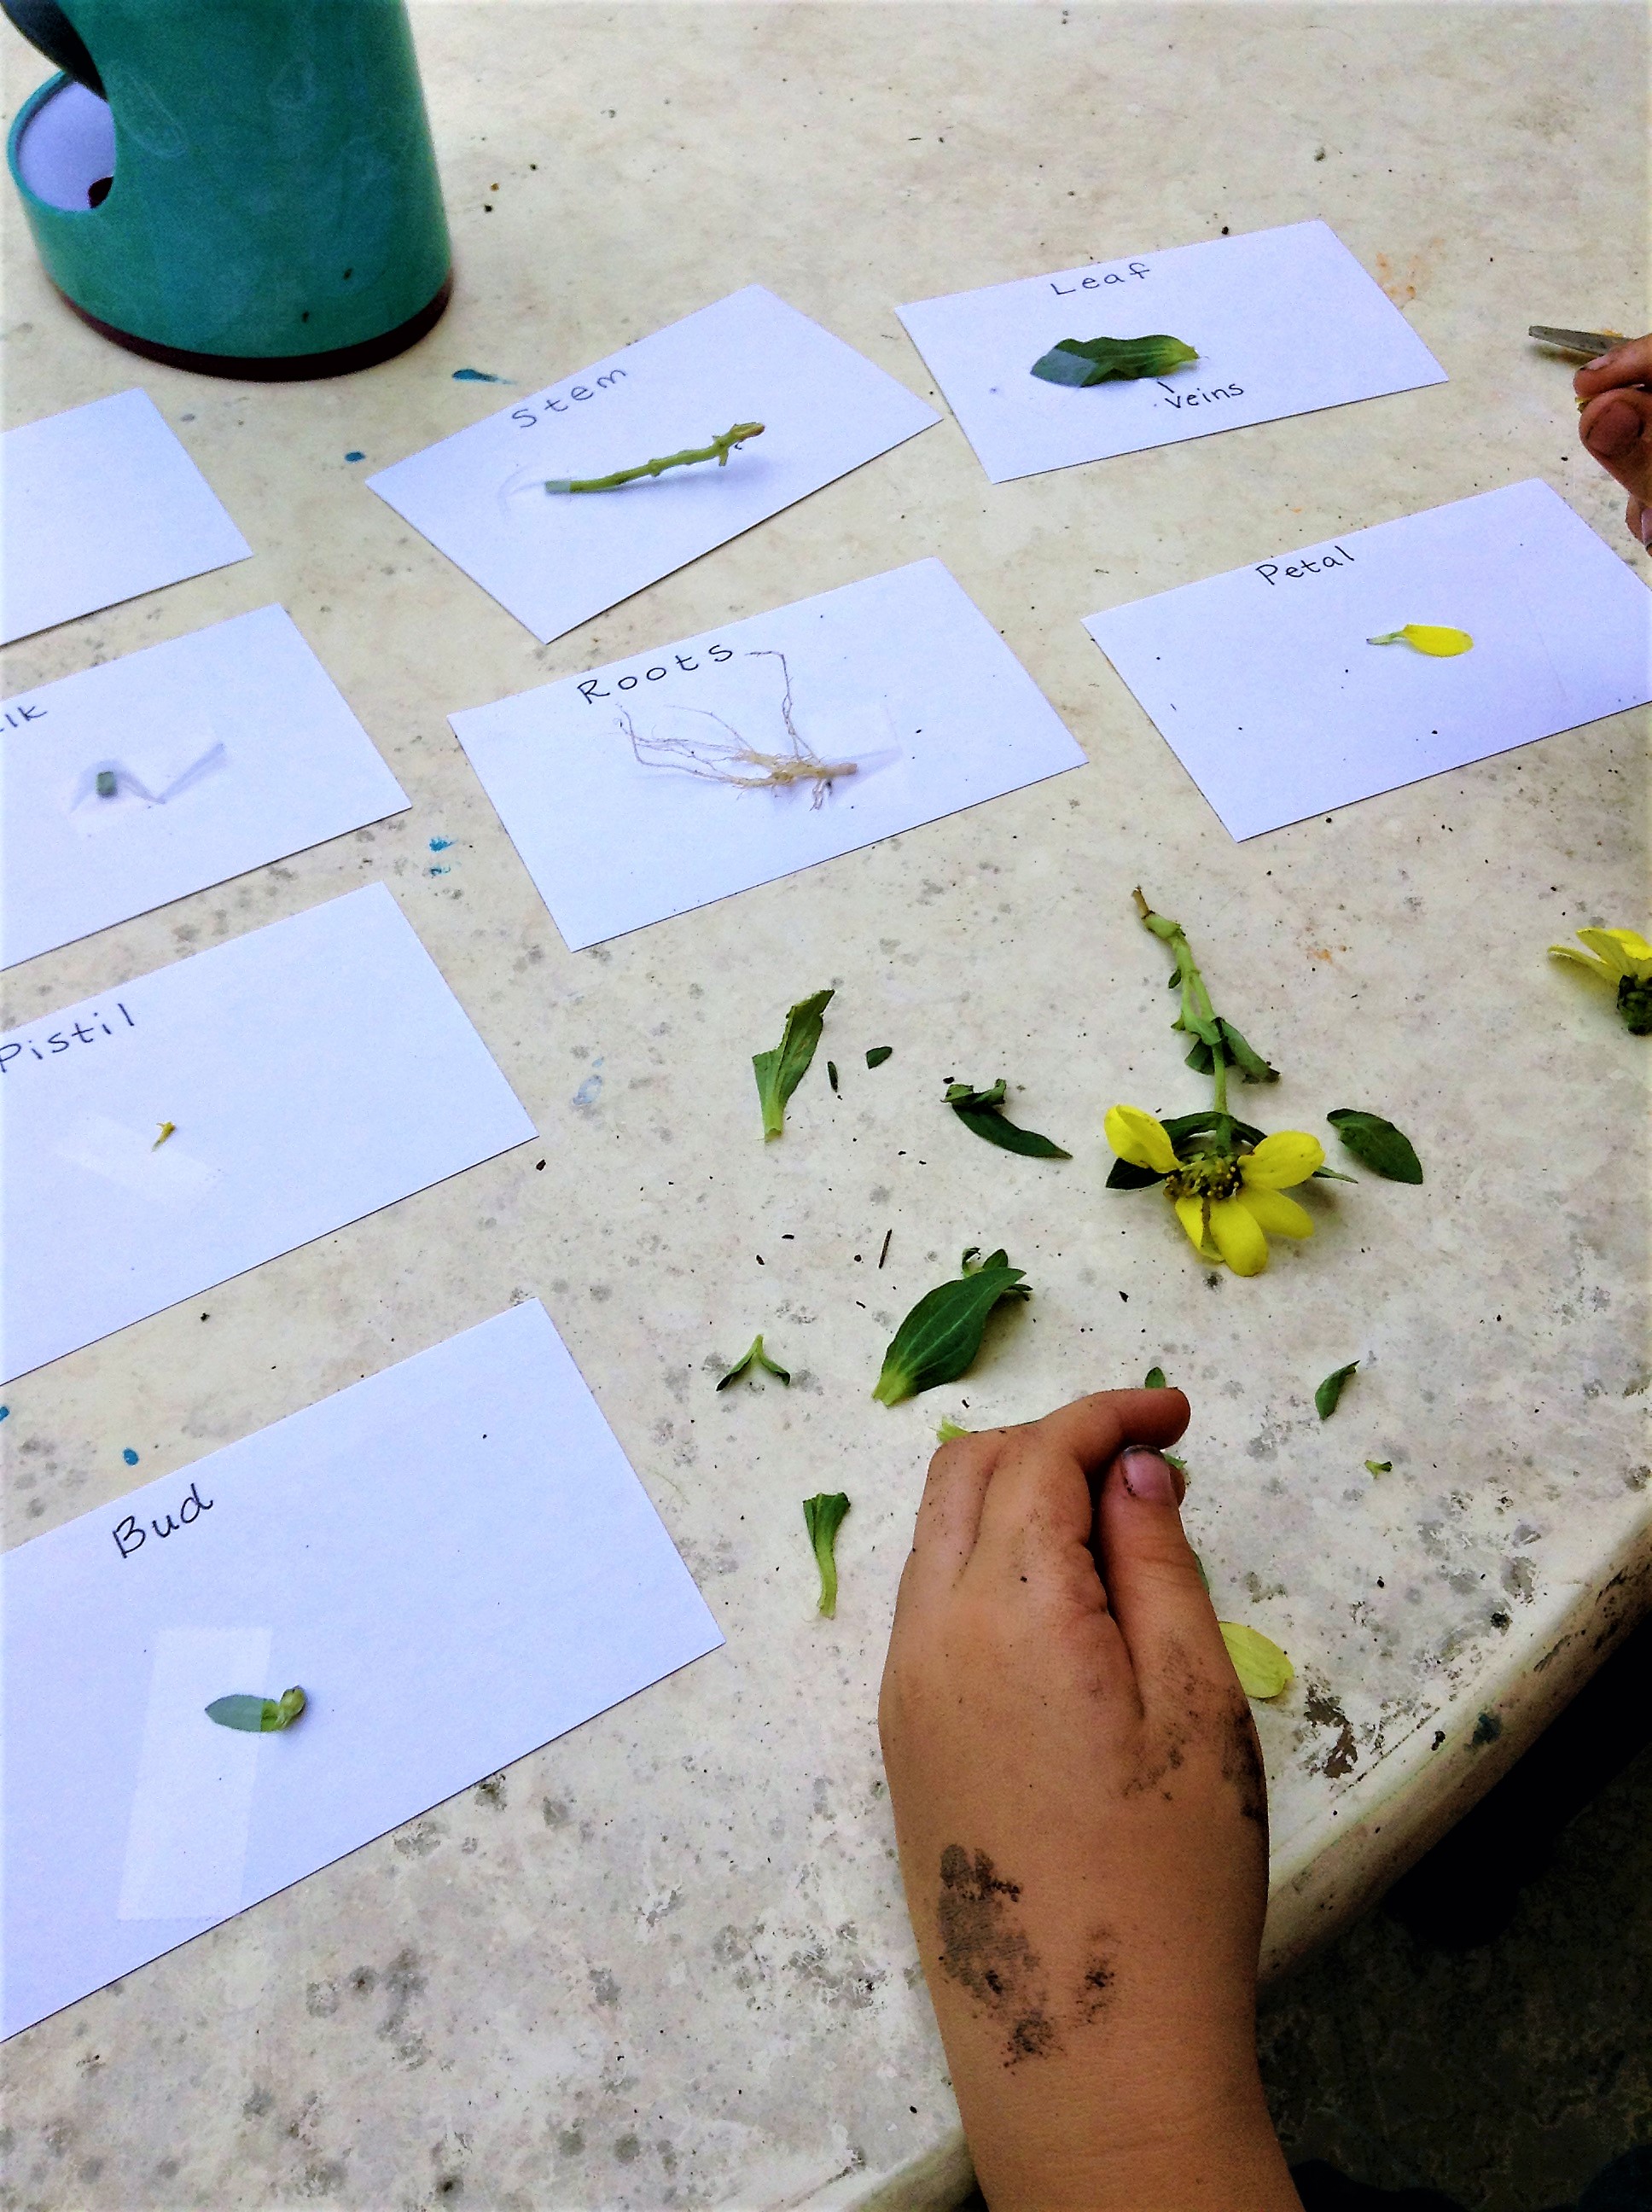
Begin dissecting the plant by cutting one small section at a time. Label each section by attaching it to an index card with tape creating your own “slides.”
Plant parts to label:
Roots
Stem
Leaf, Veins
Stalk
Petal
Stamen
Pistil
When all of your plant parts are labeled, observe each slide under a microscope or with a magnifying glass.
Tip: It’s easy to adjust your index card slides. Cut the bottom of your index card to fit under the microscope. Use the top light for a clear and close view.
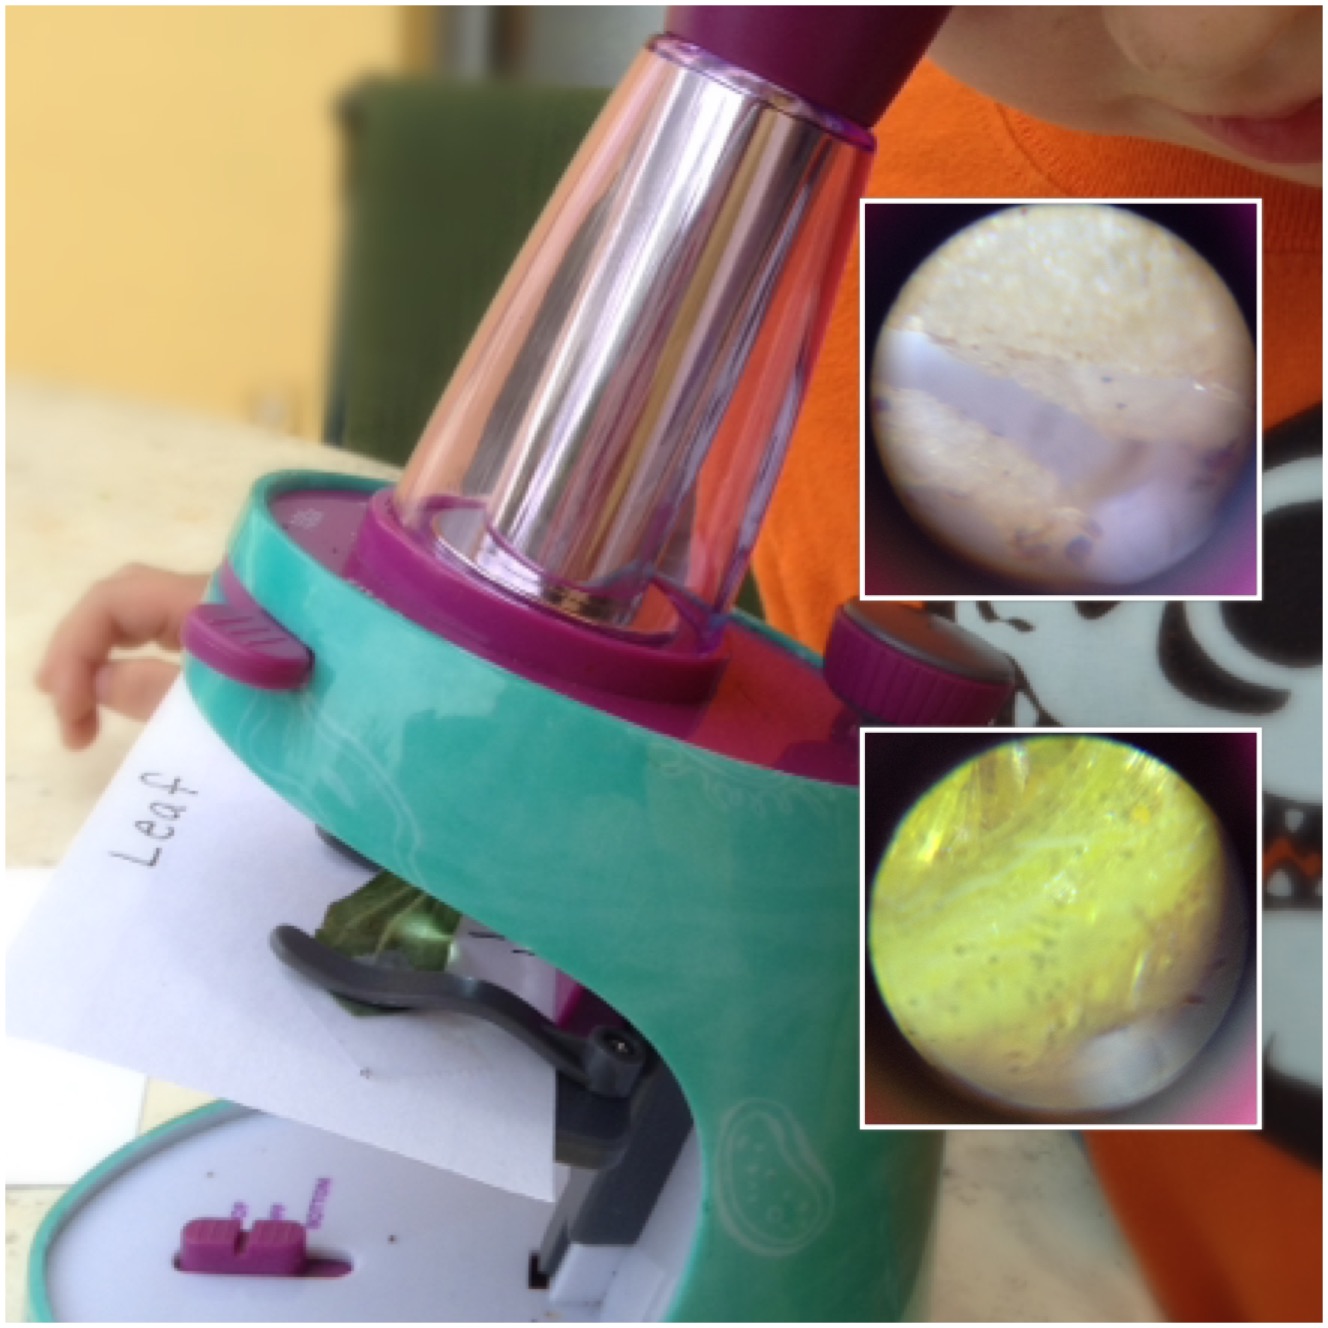
The close-ups in the above picture are the roughly textured, white roots and hairy, yellow pistil.
Investigate!
Encourage your child to describe what they observe.
What looks different up close?
What new textures or colors are visible?
Does this remind you of something you’ve seen before?
My son compared the roots to white tree bark and noticed that the pistil looked hairy. “Why do you think the pistil might be sticky or hairy?” This prompted a conversation about what the pistil is used for, and how the hairs help it catch and hold on to pollen.
After you’ve viewed all of the flower parts, arrange the cards on construction paper or poster board using tape or glue.
Draw or print a flower, or have older children draw their own. Use your index card “slides” as a word bank to label the drawing.

We did this project very slooooowly. Usually my rambunctious six year old is excited to jump in and get started, but I was pleasantly surprised how gentle and calm he was handling the plants. This turned out to be a perfect hands-on project to our Gardening Unit. He really enjoyed the up-close look. I love that this project naturally introduces new vocabulary and a deeper understanding of plants!
I hope this project inspires your child to look more closely at plants and nature. Some extension projects might include:
- Math: Addition or multiplication with petals, leaves, or seeds. Make a pattern using leaves and petals.
- Reading: Check out the children’s plant section of your local library. Look up your flower in a encyclopedia.
- Science: Dissecting a second flower to compare plant parts.
- Writing: Write a descriptive poem about your flower.
- Art: Use plant parts and mud to make a painting with natural materials.
- Technology: Look up your flower online. Can you find close up pictures that look like what you’ve observed?
Grab a copy of this project and so much more…

Enter your name and email below to have your copy sent to your inbox.

Ashley Fox is a mother of three, avid planner, homeschool enthusiast and blogger at SomeRandomLady. Follow all of her homeschool adventures on Facebook and Instagram.
If you are looking for more science resources, enter your email below to receive a scientific method packet (including experiment).


One Comment
Comments are closed.